how to set a static IP address in OS X
how to set a static IP address in mac
How To Set Up A Static IP in Mac OS X
When organizing your home or small office network sometimes it can be easier to assign each computer it’s own IP address rather than using DHCP. Today we take a look at how to do it in OS X, Watch this Video or Follow this Steps:
1- From the Apple menu, select System Preferences then Select Network
2-From the sidebar, select an active network interface. In this example, I’m connected to a Local network, so I’ll select Ethernet, if connected to a Wireless network, so I’ll select WiFi.
3- Make a note of the current IP address assigned to your Mac. You’ll need to select a new IP address from within the private IP address range listed.
4- Click Advanced.
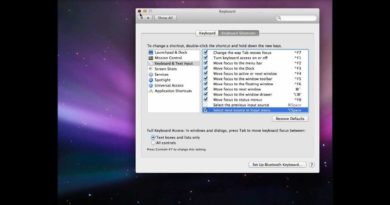
5- Select TCP/IP. The window shown below appears.
6- From the Configure IPv4 menu, select Manually.
7- Enter a static IP address in the IPv4 Address fields
8- Click OK.
9- Click Apply.
Congratulations! You have successfully set a static IP address for your Mac.